
Do you plan on scraping URLs with Scrapebox? You will commonly encounter IP blocks if you try and one of the best ways to overcome this set back is through the use of rotating proxies.
For you to better understand this, we would provide you with better knowledge of the scrapebox guide with backconnect proxies. An example of **backconnect proxies, and the one we would use if **Limeproxies.
Post Quick Links
Jump straight to the section of the post you want to read:
INTRODUCTION TO SCRAPEBOX
You can extract data from websites through web scraping or screen scraping. If the information you need is useful for SEO, then you need to work with Scrapebox. An example of its use is that you can scrape every URL for rent ads on a site until you get the best deal. It's only feasible if the site is a small one, but for a big site, you can’t do it manually.
Interesting Read : How to scrape leads through proxies?
If you can write your scraping code, then it’s great. but if you can’t or are too busy, then Scrapebox is the right tool for you. You have control over lots of settings, and it only requires a one-time payment.
The Use of Proxies When Scraping With Scrapebox
It’s necessary to use proxies with ScrapeBox, and it has its proxy harvester. This however takes time to run if you want to work with it, and can also bring up dead proxies, so its best you buy dedicated IPs and import the list to ScrapeBox.
ScrapeBox is compatible with a backconnect proxy like Limeproxies, and you would have to set up the proxies first. Since the network uses backconnect proxies, you can’t check proxies in ScrapeBox. Even though you can make use of ScrapeBox’s proxy harvester to access free public proxies, it’s not an efficient process.
Setting Up ScrapeBox with Limeproxies
1 . Run ScrapeBox
2 . In “select harvester and proxies”, look for “use proxies” and check it
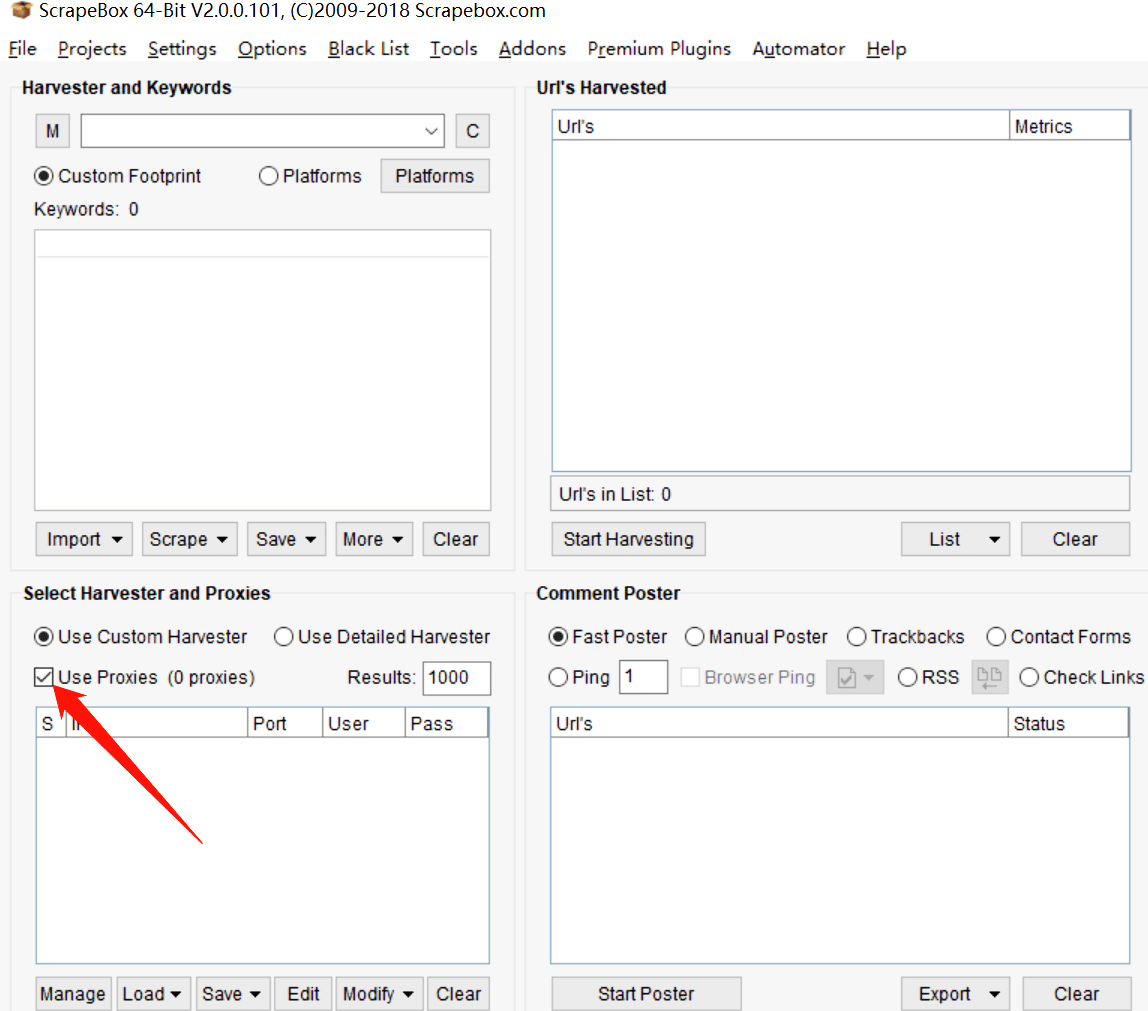
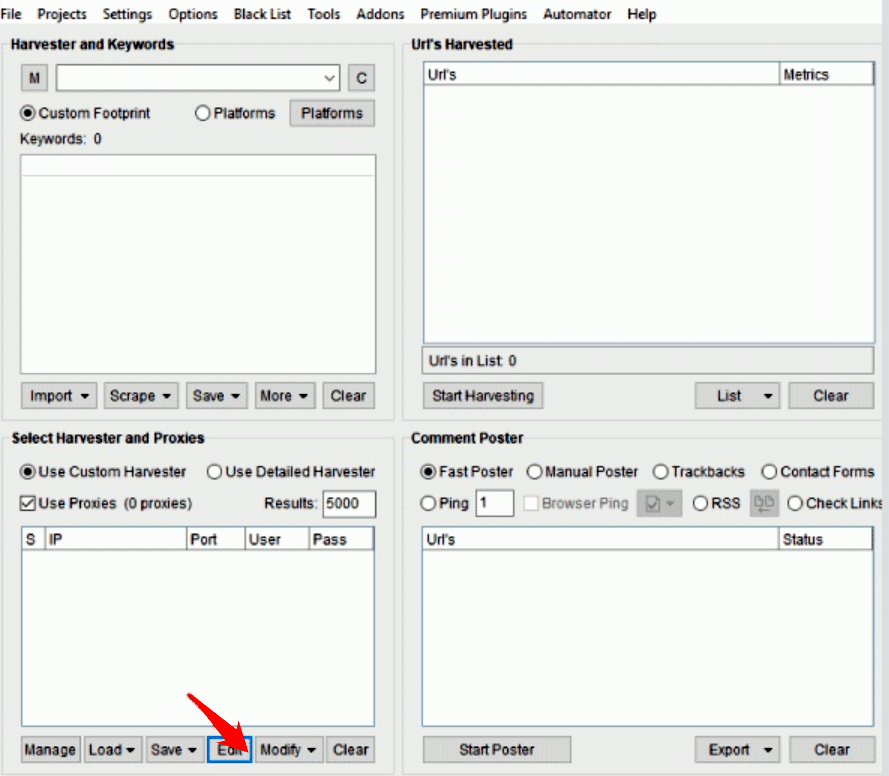
- In the same menu, click on edit to configure the proxies
-
Enter authentication information from the proxy user panel
-
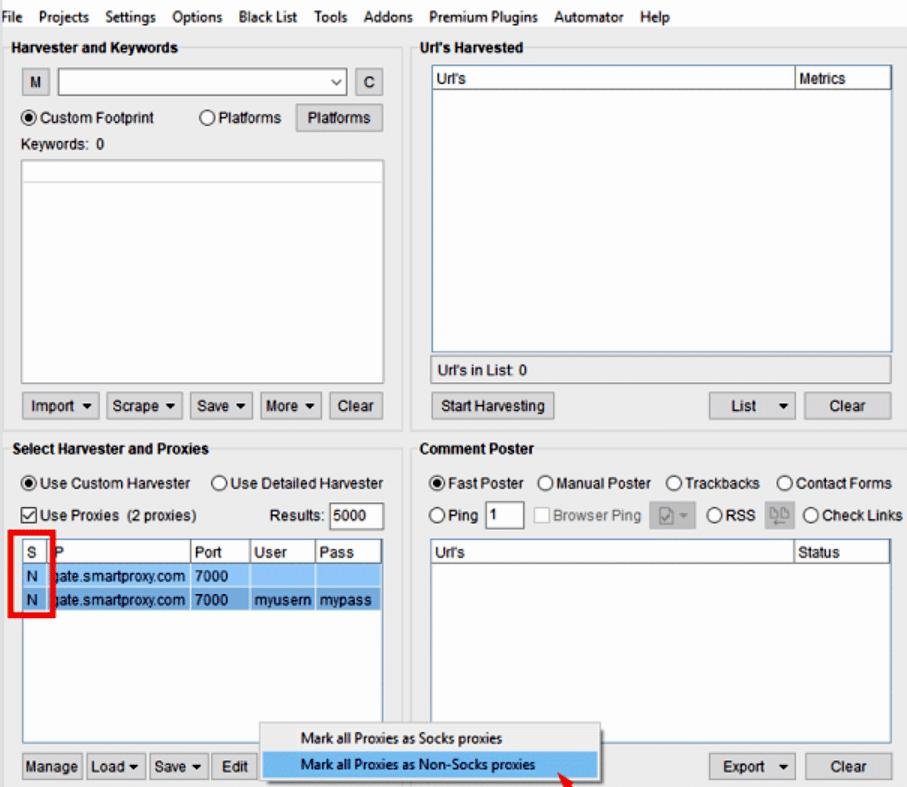
Save the settings. It would be reflected in the select harvester and proxies settings
-
Choose the proxies that have been entered and click on “modify”
-
Select “mark all proxies as non-socks proxies”**
The letter “N’ (None) appears beside each proxy in the “S” (Socks) column, and you must select them as stated above because the proxies only support HTTP(S) protocol. With ScrapeBox, HTTP proxies are enough to scrape URLs.
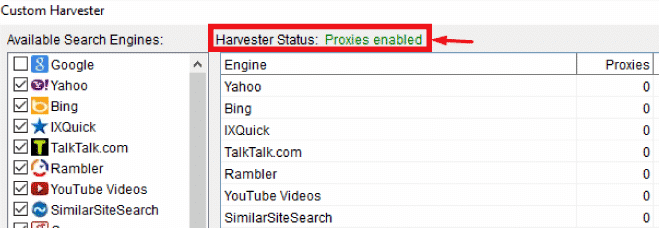
- Configure the other parts of your ScrapeBox settings and check if your harvester status reads “Proxies Enabled”. If this is the case, you can run a test.
Don’t check “proxy status”.
Limeproxies’ backconnect proxy gives you a pool of IPs that can be rotated for each connection, so there is always a live proxy ready. Scrapebox checks are set to handle static proxy lists that may contain dead proxies, but since LimeProxies gives you a fresh proxy each time, you have nothing to worry about.
Keywords Scraping with Scrapebox and Limeproxies
This is a simple test that will show if Limeproxies is compatible with Scrapebox. We would use the keywords ‘pewdiepie’ and ‘pewds’ by adding them to the harvester. More keywords can be added but as they won’t be useful in the test, we would use just these two. If it works as it should, hundreds or thousands of related keywords and URLs should be gotten for SEO analysis.
Once all keywords have been uploaded, click “Start harvesting”, and then select the search engines you would want to scrape. The number of keywords added makes no difference because if the proxies work they would do so for any number of keywords.
Interesting Read : How to Scrape Competitor Prices with Proxies?
For this test we would be using 6 search engines for the two keywords we would be testing on. The search engines include google, yahoo search, YouTube, Bing, Search.com, and Ecosia.org. Before the test is started, we would check that the harvester status reads “proxies enabled” and only then would we click on “start”.
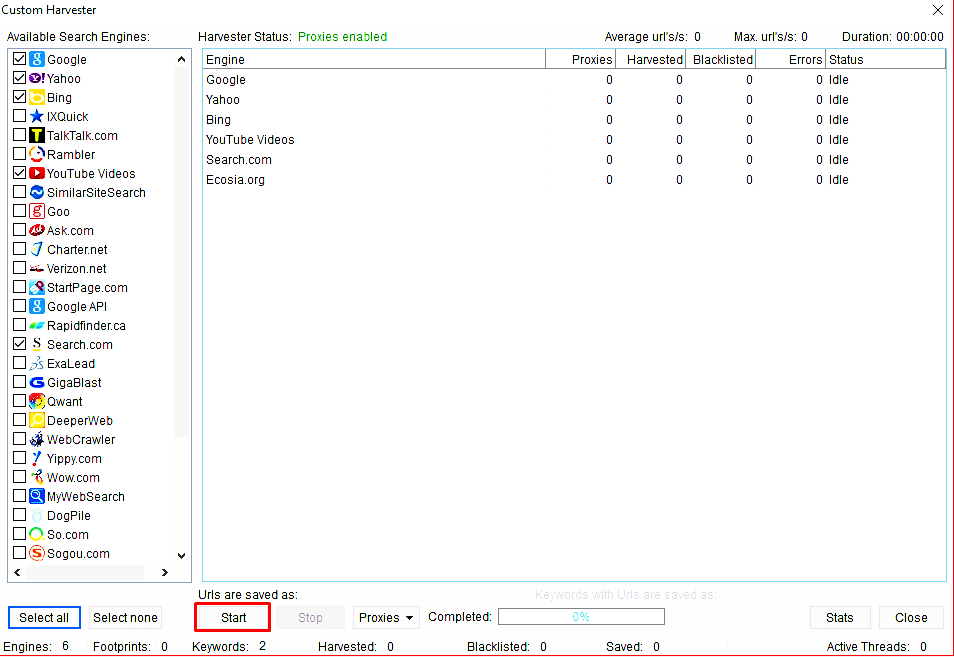
From the screenshot above, you can see that it took about 10 seconds to scrape close to 1,000 URLs from google. In the end, the result that would be gotten is better because the total result would be three times more than what would be gotten from google alone.
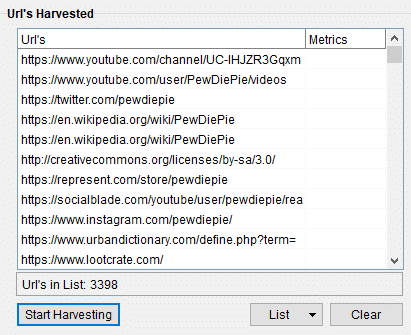
The scrape list shows that 3,398 URLs were harvested which is a good mark. The data can then be exported for research, other scrapes, and other purposes.


About the author
Rachael Chapman
A Complete Gamer and a Tech Geek. Brings out all her thoughts and Love in Writing Techie Blogs.
Related Articles
How Does Gmail Stop Scanning Inboxes of Free Account Holders?
Well, if you do not know Gmail then you definitely have been living under a rock for the past decade! Gmail is the world’s most predominant email service.
10 Best Data Analysis & Management Tools To Eliminate Programming
Here are 10 Data Analysis & Management Tools To Eliminate Programming that you would use in your day to day life by limeproxies.