
TL;DR: To change your Android IP address: For public IP — use a VPN or proxy (fastest and most flexible). For local Wi-Fi IP — go to Settings → Wi-Fi → Modify Network → Static IP. For mobile data IP — toggle Airplane Mode. All 5 methods covered below with exact steps for Android 12–15.
Why Change Your IP Address on Android?
Your IP address reveals more about you than most people realize:
- Physical location — accurate to city level, sometimes neighborhood
- Internet Service Provider — visible to every website you visit
- Browsing patterns — combined with cookies, your IP helps build tracking profiles
- Account linkage — streaming services, social platforms, and e-commerce sites link your activity to your IP
Common reasons to change your Android IP:
- Access geo-blocked content — streaming libraries, regional news, region-locked apps
- Bypass IP-based bans — gaming platforms, forums, streaming services
- Improve privacy — prevent websites from tracking your real location
- Network troubleshooting — test how a service behaves for IPs in different regions
- Avoid IP bans when scraping — automated data collection requires rotating IPs
- Security research — test geolocation-dependent application behavior
Understanding IP Address Types on Android
Before changing your IP, understand which IP you're targeting:
| IP Type | What It Is | Who Assigns It | Who Can See It | |---|---|---|---| | Public IP | Your identity on the internet | Your ISP (or mobile carrier) | Every website, service, server | | Local Wi-Fi IP | Your device on the home/office network | Your router (DHCP) | Only devices on the same network | | Carrier IP | Your IP when on mobile data | Your mobile carrier | Every website when on cellular |
Most people want to change their public IP — the one websites see. Methods 1, 4, and 5 below change your public IP. Methods 2 and 3 change your local IP.
Method 1: Use a Proxy Server (Fastest, Most Control)
A proxy server routes your traffic through a remote server, making websites see the proxy's IP instead of yours. Unlike a VPN, proxies can be configured per-app or system-wide.
Option A: System-Wide HTTP Proxy (Wi-Fi)
- Open Settings → Wi-Fi
- Long-press your connected Wi-Fi network → Modify Network
- Tap Show Advanced Options
- Under Proxy, select Manual
- Enter:
- Proxy hostname: Your proxy server's IP or domain
- Proxy port: Port number (typically 8080, 3128, or 80 for HTTP)
- Optionally, add domains to bypass proxy in Bypass proxy for
- Tap Save
Your Android device now routes all Wi-Fi traffic through the proxy server's IP.
Option B: SOCKS5 Proxy via App (All Traffic Including Apps)
For full traffic routing including apps (not just browsers), use a SOCKS5 client:
- Install Shadowsocks from F-Droid or APKMirror
- Add a new profile with your SOCKS5 proxy credentials
- Enter host, port, username, and password
- Select Global Proxy mode — all app traffic routes through the proxy
- Tap Connect
Why SOCKS5? Unlike HTTP proxies, SOCKS5 handles all protocols (TCP + UDP), works with gaming apps, streaming, and browsers, and supports authentication for private proxies.
Option C: Rotating Proxy for Dynamic IP Changes
For use cases requiring frequent IP changes (web scraping, account management, price research):
Use a rotating residential proxy that automatically assigns a new IP address with each connection or at configured intervals. These proxies use real residential IPs from ISP subscribers, making your traffic indistinguishable from organic mobile users.
Connection example using Shadowsocks:
- Host:
gate.limeproxies.com - Port:
5432 - Authentication: your proxy credentials
- Protocol: SOCKS5
Method 2: Change Local Wi-Fi IP (Static IP)
This changes your device's IP on the local network only. Useful for network configuration, port forwarding, and avoiding DHCP assignment conflicts.
Steps for Android 12–15:
- Open Settings
- Tap Network & Internet → Wi-Fi
- Tap the gear icon ⚙️ next to your connected network (or long-press → Modify)
- Tap Edit (pencil icon in top right)
- Expand Advanced options
- Change IP settings from DHCP to Static
- Fill in:
- IP address: Choose an IP in your router's range (e.g.,
192.168.1.150) - Gateway: Your router's IP (usually
192.168.1.1— find in Settings → Wi-Fi → Network Details) - Network prefix length:
24(standard home network) - DNS 1:
8.8.8.8(Google) or1.1.1.1(Cloudflare) - DNS 2:
8.8.4.4or1.0.0.1
- IP address: Choose an IP in your router's range (e.g.,
- Tap Save
Finding your router's IP: Settings → Wi-Fi → tap connected network → see "Gateway" address.
Tip: Choose a static IP outside your router's DHCP range to avoid conflicts. Check your router admin panel (usually at 192.168.1.1) to see what range it assigns dynamically.
Method 3: Forget and Rejoin Wi-Fi Network
When you forget a network and reconnect, your router issues a new DHCP assignment, which is often a different local IP. This is the simplest method for changing your local network IP.
- Settings → Wi-Fi
- Long-press your network → Forget Network
- Wait 30 seconds
- Reconnect to the same network
Your router will assign a new IP from its DHCP pool.
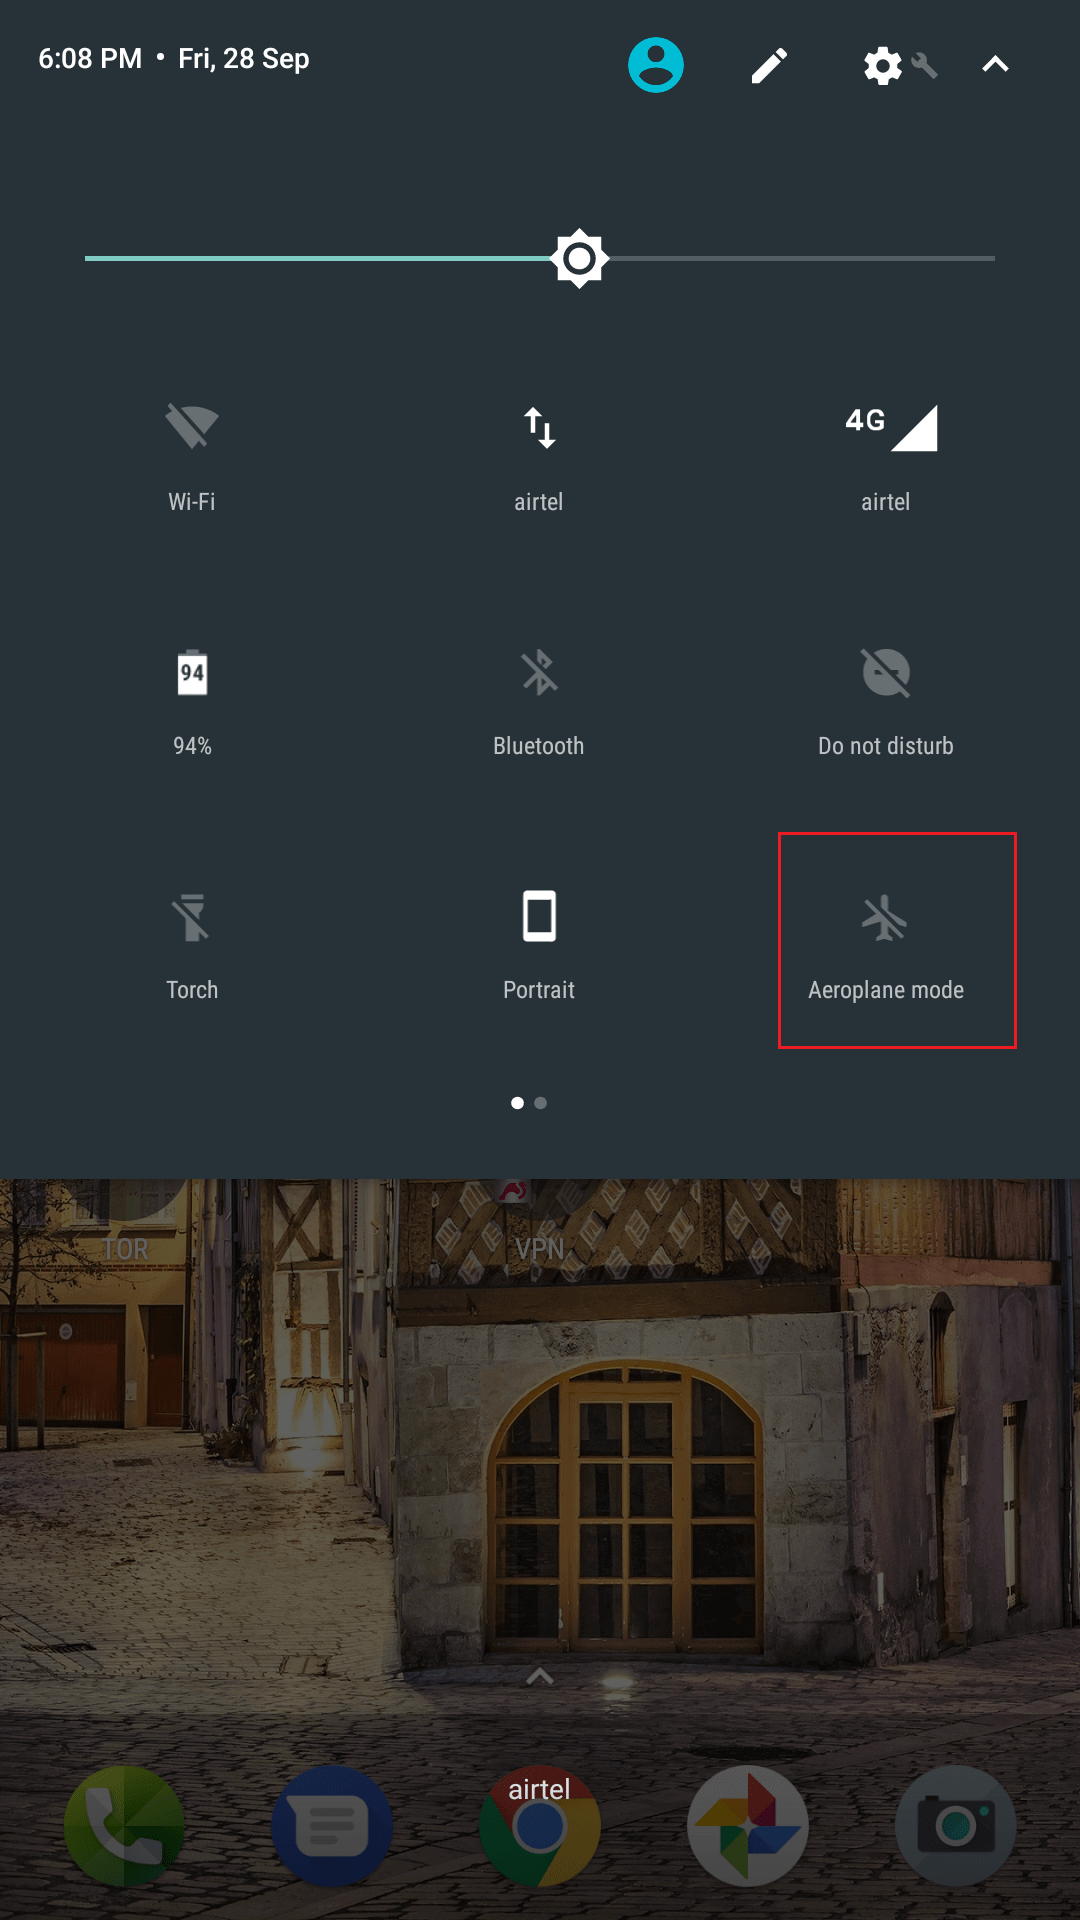
Method 4: Airplane Mode Toggle (Mobile Data IP)
For changing your mobile carrier IP (the public IP used when on cellular data):
- Swipe down from the top of the screen
- Tap Airplane Mode to enable it (wait 5–15 seconds)
- Tap Airplane Mode again to disable it
When your device reconnects to the carrier network, it requests a new IP from the carrier's DHCP server. Most carriers use dynamic IP addresses, so you'll typically receive a different one.
Caveats:
- Some carriers use sticky IP assignment — you may get the same IP back
- This only works for mobile data, not Wi-Fi
- You lose all connectivity during the airplane mode cycle
Alternative: If airplane mode doesn't give you a new IP, power off the device completely, wait 5 minutes, and power back on. A full network stack restart forces a fresh DHCP request.
Method 5: Use a VPN App (Easiest for Public IP Change)
VPNs route all your traffic through a remote server and assign you the VPN server's IP. This is the most user-friendly method for changing your public IP with location control.
Steps:
- Install a VPN app from the Play Store (ProtonVPN, Mullvad, ExpressVPN, NordVPN)
- Create an account
- Select a server in your desired country
- Tap Connect
Proxy vs VPN comparison for Android:
| Feature | Proxy | VPN | |---|---|---| | Setup complexity | Moderate | Easy | | Encryption | HTTP: none; SOCKS5: none by default | Full encryption | | Per-app routing | Yes (some apps) | Usually all traffic | | Speed | Faster (no encryption overhead) | Slightly slower | | IP control | Specific IP or rotating | Server location | | Price | From $3/month | $5–12/month | | Best for | Scraping, automation, multiple accounts | Privacy, geo-unblocking |
How to Verify Your New IP Address on Android
After changing your IP using any method:
- Open Chrome or any browser
- Go to
whatismyip.com,ip.me, orcheck.torproject.org - Your new public IP will be displayed along with detected location
For local IP: Settings → Wi-Fi → tap connected network → see IP address displayed.
Privacy Best Practices for Android IP Management
Changing your IP is only one layer of privacy. For comprehensive protection:
| Layer | Method | Protection Against | |---|---|---| | IP masking | Proxy or VPN | Location tracking, IP-based profiling | | DNS encryption | DNS-over-HTTPS (Private DNS in Android 9+) | DNS query surveillance | | Ad blocking | AdGuard or NextDNS | Tracking pixels, fingerprinting | | App permissions | Revoke location, contacts, camera permissions | App-level data harvesting | | Browser | Firefox + uBlock Origin | Cookie tracking, fingerprinting |
Setting up Private DNS (Encrypted DNS) on Android:
- Settings → Network & Internet → Advanced → Private DNS
- Select "Private DNS provider hostname"
- Enter:
dns.nextdns.ioor1dot1dot1dot1.cloudflare-dns.com
This encrypts all DNS queries, preventing your ISP from seeing which domains you visit.
Use Cases: Which Method to Choose
| Use Case | Best Method | Why | |---|---|---| | Stream geo-blocked content | VPN | Easy location switching, full traffic routing | | Bypass Wi-Fi IP ban | Method 2 (static IP) or rejoin | Changes local network identity | | Automated web scraping | Rotating residential proxy | Cycles IPs automatically, bypasses bot detection | | Gaming — reduce lag via specific routing | SOCKS5 proxy | Faster than VPN, routes game traffic only | | Privacy while browsing | Proxy or VPN | Hides real public IP from sites | | Testing geolocation features | Datacenter proxy | Fast, specific IP locations |
For scraping and automation specifically, rotating residential proxies are the professional standard. Each request appears to come from a different real device in a different location — impossible to distinguish from organic mobile traffic.
Explore SOCKS5 proxy plans for Android apps that support the protocol natively.
Last updated: March 2026
Post Quick Links
Jump straight to the section of the post you want to read:


About the author
Rachael Chapman
A Complete Gamer and a Tech Geek. Brings out all her thoughts and Love in Writing Techie Blogs.
View all postsRelated Articles
Datacenter vs Residential Proxies: Which Should You Choose in 2026?
Datacenter proxies are faster and cheaper for most tasks. Residential proxies handle heavily bot-protected sites. This guide breaks down every difference so you pick the right type — and avoid overpaying.
How to Use Proxies for E-Commerce Price Monitoring in 2026
Proxies are the backbone of reliable e-commerce price monitoring. Discover how to track competitor prices at scale, beat anti-bot systems, monitor geo-specific pricing, and build a full price intelligence stack in 2026.
Web Scraping With Proxies: The Complete Guide for 2026
Web scraping with proxies lets developers and businesses collect data at scale without IP bans or rate limits. This complete 2026 guide covers Python setup, proxy rotation, tool comparisons, anti-bot tactics, and ethical best practices.